etcd集群

etcd

存储那些 Kubernetes 数据

  1. 集群配置信息:
    • Kubernetes 集群的配置信息,包括 API 服务器的配置、网络插件配置、安全策略等。
  2. 节点信息:
    • 每个集群节点的信息,包括节点的 IP 地址、节点的健康状态、角色(Master 或 Worker)等。
  3. Pod 信息:
    • 每个运行中的 Pod 的配置和状态信息,包括容器的镜像、环境变量、挂载的卷以及当前运行的状态等。
  4. Service 信息:
    • Kubernetes Service 对象的信息,包括服务的 IP 地址、端口映射、服务类型等。
  5. Namespace 信息:
    • 每个命名空间的配置和状态信息,包括命名空间内的资源对象如 Pod、Service、Deployment 等的信息。
  6. 配置映射(ConfigMap):
    • 存储 ConfigMap 对象的配置信息,这些信息可以被 Pod 中的容器引用。
  7. Secret 信息:
    • 存储 Secret 对象的敏感信息,如 API 密钥、证书等。
  8. 持久卷(Persistent Volume)和持久卷声明(Persistent Volume Claim):
    • 存储持久卷和持久卷声明的配置信息。
  9. 控制器信息:
    • 存储控制器对象的信息,如 Deployment、StatefulSet、DaemonSet 等的配置和状态信息。

存储的数据形式关键点:

  1. Key(键):
    • Key 是一个字符串,用于唯一标识存储的数据。在 etcd 中,Key 的结构通常包含了多个部分,以层次结构的方式组织数据。例如,Kubernetes 中可能使用 /registry/pods/default/my-pod 这样的键来表示一个 Pod 对象。
  2. Value(值):
    • Value 是与 Key 相关联的数据。它可以是任意格式的字节流,etcd 本身不关心 Value 的具体内容,这是由应用程序决定的。
  3. 目录(Directory):
    • etcd 支持将 Key 组织成目录结构,通过在 Key 中使用斜杠(/)来模拟目录。例如,/registry/pods/ 可能是一个包含所有 Pod 对象的目录。
  4. 事务(Transaction):
    • etcd 支持事务操作,允许多个键值对的原子性操作。这样可以确保一组相关的数据项要么全部成功写入,要么全部失败。
  5. Watch(监听):
    • etcd 支持 Watch 操作,使客户端能够监听特定 Key 或目录的变更,从而实现实时的事件通知。
  6. Lease(租约):
    • etcd 中引入了租约概念,可以将一个键值对与一个租约关联。当租约到期时,相关的键值对可能被自动删除。

示例键值对:

  • Key: /registry/pods/default/my-pod
  • Value: JSON 格式的 Pod 对象序列化数据

MVCC

Revision、CreateRevision 和 ModRevision

Revision 类型 描述
Revision - 表示 etcd 存储中的全局、单调递增版本号。
- 每次写操作(put、delete)都会使 Revision 递增。
- 是只读的,不会因数据变更而减小。
CreateRevision - 表示键值对创建版本号。
- 在数据创建时,CreateRevision 的值等于当前 Revision。
- 在后续的修改中,CreateRevision 的值不会改变,仍然保持初始创建时的 Revision。
ModRevision - 表示键值对修改版本号。
- 在数据创建时,ModRevision 的值等于当前 Revision。
- 在数据修改时,ModRevision 的值会递增,反映了修改操作的版本。
Version 这个key刚创建时Version为1,之后每次更新都会自增,即这个key从创建以来更新的总次数。
关联关系 - 对于一个键值对,CreateRevision 和 ModRevision 在创建时相等,都等于创建时的 Revision。
- 随着键值对的修改,ModRevision 会递增,而 CreateRevision 保持不变。
应用场景 - Revision 主要用于实现乐观并发控制,客户端可以使用 Revision 来判断数据是否发生变更。
- CreateRevision 和 ModRevision 可以用于跟踪特定键值对的创建和修改历史。

网络

https://github.com/bitnami/bitnami-docker-etcd

1
$ etcdctl set /atomic.io/network/config '{"Network":"121.21.0.0/16","Backend":{"Type":"vxlan"}}'

{“Network”:”121.21.0.0/16”,”Backend”:{“Type”:”vxlan”}}

Couldn’t fetch network config: client: response is invalid json. The endpoint is probably not valid etcd cluster endpoint. timed out

查阅 flanneld 官网文档,上面标准了 flannel 这个版本不能给 etcd 3 进行通信

1
2
$ etcdctl put /atomic.io/network/config '{"Network":"121.21.0.0/16","Backend":{"Type":"vxlan"}}'
$ etcdctl del /atomic.io/network/config

API VERSION:3.2

Did you mean this?
get
put
del
user

etcd environment文档

https://doczhcn.gitbook.io/etcd/index/index-1/configuration

1
2
3
4
5
6
7
8
9
10
cs@debian:~/oss/0s/k8s$ sudo modprobe -v ip_vs
insmod /lib/modules/4.9.0-8-amd64/kernel/net/netfilter/ipvs/ip_vs.ko
cs@debian:~/oss/0s/k8s$ sudo modprobe -v ip_vs_rr
insmod /lib/modules/4.9.0-8-amd64/kernel/net/netfilter/ipvs/ip_vs_rr.ko
cs@debian:~/oss/0s/k8s$ sudo modprobe -v ip_vs_wrr
insmod /lib/modules/4.9.0-8-amd64/kernel/net/netfilter/ipvs/ip_vs_wrr.ko
cs@debian:~/oss/0s/k8s$ sudo modprobe -v ip_vs_sh
insmod /lib/modules/4.9.0-8-amd64/kernel/net/netfilter/ipvs/ip_vs_sh.ko
cs@debian:~/oss/0s/k8s$ sudo modprobe -v ip_vs_nq
insmod /lib/modules/4.9.0-8-amd64/kernel/net/netfilter/ipvs/ip_vs_nq.ko
1
2
3
4
5
cs@debian:~/oss/0s/k8s$ sudo ipvsadm -ln
IP Virtual Server version 1.2.1 (size=4096)
Prot LocalAddress:Port Scheduler Flags
-> RemoteAddress:Port Forward Weight ActiveConn InActConn

1
2
3
#两种临时方法
# echo 1 > /proc/sys/net/ipv4/vs/conntrack
# sysctl -w net.ipv4.vs.conntrack=1

想永久保留配置,可以修改/etc/sysctl.conf文件

1
kubectl create clusterrolebinding test:anonymous --clusterrole=cluster-admin --user=system:anonymous

configmaps is forbidden: User “system:anonymous” cannot list resource “configmaps” in API group “” in the namespace “default”

certificatesigningrequests

1
2
[vagrant@k8s master]$ kubectl create clusterrolebinding kubelet-bootstrap --clusterrole=system:node-bootstrapper --user=kubelet-bootstrap
clusterrolebinding.rbac.authorization.k8s.io/kubelet-bootstrap created

error: failed to run Kubelet: cannot create certificate signing request: certificatesigningrequests.certificates.k8s.io is forbidden: User “kubelet-bootstrap” cannot create certificatesigningrequests.certificates.k8s.io at the cluster

proxy

unable to create proxier: can’t set sysctl net/ipv4/conf/all/route_localnet to 1: open /proc/sys/net/ipv4/conf/all/route_localnet: read-only file system

1
2
3
4
5
6
7
8
9
 sduo  cat > /etc/sysconfig/modules/ipvs.modules <<EOF
#!/bin/bash
modprobe -- ip_vs
modprobe -- ip_vs_rr
modprobe -- ip_vs_wrr
modprobe -- ip_vs_sh
modprobe -- ip_vs_nq
modprobe -- nf_conntrack_ipv4
EOF
1
2
3
4
5
6
7
8
9
containers:
- name: kube-flannel
image: k8s.org/k8s/flannel:v0.11.0-amd64
command:
- /opt/bin/flanneld
args:
- --ip-masq
- --kube-subnet-mgr
- --iface=eth1

–iface=eth1

1
2
3
4
5
cs@debian:~$ ansible k8s-108 -m copy -a "src=/home/cs/oss/0s/k8s/kube-apiserver/docker-compose.yml dest=/opt/kubernetes/master/docker-compose.yml"   -b --become-method sudo --become-user root


ansible k8s-108 -m copy -a "src=/opt/kubernetes/client/k8s-1.21-11/bin/config.yaml dest=/opt/kubernetes mode=0644" \
-b --become-method sudo --become-user root
1
2
3
4
5
[root@k8s kubernetes]# cat > /etc/sysctl.d/k8s.conf << EOF
net.ipv4.ip_forward = 1
net.bridge.bridge-nf-call-ip6tables = 1
net.bridge.bridge-nf-call-iptables = 1
EOF

kubelet.service

1
2
3
4
5
6
7
8
9
10
11
12
13
14
15
16
	cat>/usr/lib/systemd/system/kubelet.service<<EOF
[Unit]
Description=Kubernetes Kubelet Server
Documentation=https://github.com/GoogleCloudPlatform/kubernetes
After=docker.service
Requires=docker.service

[Service]
WorkingDirectory=/var/lib/kubelet
EnvironmentFile=/opt/kubernetes/kubelet.env
ExecStart=/opt/kubernetes/bin/kubelet \$KUBELET_OPTIONS
Restart=on-failure

[Install]
WantedBy=multi-user.target
EOF
kubelet.env
1
2
3
4
5
6
7
8
9
10
11
 cat>/opt/kubernetes/kubelet.env<<EOF
KUBELET_OPTIONS=" --hostname-override=192.168.56.108 \
--pod-infra-container-image=k8s.org/k8s/pause:3.4.1 \
--bootstrap-kubeconfig=/opt/kubernetes/config/bootstrap.kubeconfig \
--kubeconfig=/opt/kubernetes/config/kubelet.kubeconfig \
--config=/opt/kubernetes/config/kubelet-conf.yaml \
--register-node=true \
--cni-bin-dir=/opt/kubernetes/cni/bin --cni-conf-dir=/opt/kubernetes/cni/net.d --network-plugin=cni \
--runtime-cgroups=/systemd/system.slice \
--logtostderr=true "
EOF

apiserver

参数调整

  • --max-mutating-requests-inflight :在给定时间内的最大 mutating 请求数,调整 apiserver 的流控 qos,可以调整至 3000,默认为 200
  • --max-requests-inflight:在给定时间内的最大 non-mutating 请求数,默认 400,可以调整至 1000
  • --watch-cache-sizes:调大 resources 的 watch size,默认为 100,当集群中 node 以及 pod 数量非常多时可以稍微调大,比如:--watch-cache-sizes=node#1000,pod#5000

分摊

etcd集群的io压力 etcd-servers-overrides

Pod、Services、Configmaps、Deployment …

1
--etcd-servers-overrides=/events#https://xxx:3379;https://xxx:3379;https://xxx:3379;https://xxxx:3379;https://xxx:3379

事件

event维度拆分

默认存储2小时,事件变化拉取,创建,没有业务依赖

心跳Lease资源
Pod 资源

负载

v1.14 版本才被完全修复( kubelet: fix fail to close kubelet->API connections on heartbeat failure #78016)

ui

https://github.com/evildecay/etcdkeeper/releases

./etcdkeeper -p=65530 -usetls -cacert=/etc/kubernetes/pki/etcd/ca.crt -key=/etc/kubernetes/pki/etcd/server.key -cert=/etc/kubernetes/pki/etcd/server.crt

add

一个learner成员,不参与投票

1
2
3
4
5
6
7
8
9
10
11
12
13
14
15
16
17
18
[root@testl etcd-v3.5.11]# ./etcdctl  member add  etcd04 --peer-urls="http://127.0.0.16:2350" --learner=true
Member 690b31e00158f43a added to cluster 99ae9d962d824d7b

ETCD_NAME="etcd4"
ETCD_INITIAL_CLUSTER="etcd4=http://127.0.0.1:2350,etcd3=http://127.0.0.1:2360,etcd1=http://127.0.0.1:2380,etcd2=http://127.0.0.1:2370"
ETCD_INITIAL_ADVERTISE_PEER_URLS="https://127.0.0.1:2350"
ETCD_INITIAL_CLUSTER_STATE="existing"
#可以看到该成员尚未启动
[root@test etcd-v3.5.11]# ./etcdctl member list -w table
+------------------+-----------+--------+----------------------------+-----------------------+------------+
| ID | STATUS | NAME | PEER ADDRS | CLIENT ADDRS | IS LEARNER |
+------------------+-----------+--------+----------------------------+-----------------------+------------+
| 690b31e00158f43a | unstarted | | http://127.0.0.1:2350 | | true |
| 6ea1523f71bf92f0 | started | etcd3 | http://127.0.0.1:2360 | http://127.0.0.1:2359 | false |
| 7637173a60d743e5 | started | etcd1 | http://127.0.0.1:2380 | http://127.0.0.1:2379 | false |
| ce6b0efed2935560 | started | etcd2 | http://127.0.0.1:2370 | http://127.0.0.1:2369 | false |
+------------------+-----------+--------+----------------------------+-----------------------+------------+

member promote命令提升 ,learner成员提升为follower(投票权)成员

1
2
3
4
5
6
7
8
9
10
11
12
[root@test etcd-v3.5.11]# ./etcdctl  member  promote c64a0c36c4a5869f
Member c64a0c36c4a5869f promoted in cluster 99ae9d962d824d7b
[root@test etcd-v3.5.11]# ./etcdctl member list -w table
+------------------+---------+--------+-----------------------+-----------------------+------------+
| ID | STATUS | NAME | PEER ADDRS | CLIENT ADDRS | IS LEARNER |
+------------------+---------+--------+-----------------------+-----------------------+------------+
| 6ea1523f71bf92f0 | started | etcd3 | http://127.0.0.1:2360 | http://127.0.0.1:2359 | false |
| 7637173a60d743e5 | started | etcd1 | http://127.0.0.1:2380 | http://127.0.0.1:2379 | false |
| c64a0c36c4a5869f | started | etcd4 | http://127.0.0.1:2350 | http://127.0.0.1:2349 | false | #可以看到已经不是learner了
| ce6b0efed2935560 | started | etcd2 | http://127.0.0.1:2370 | http://127.0.0.1:2369 | false |
+------------------+---------+--------+-----------------------+-----------------------+------------+

redis集群

集群和哨兵

配置

集群

特点

集群负载均衡

热点数据分片都在同一个槽 (1.重新分片 2.槽节点配置从服务器?)

投票选举

容器

start

重启容器ip变化导致配置不对

1
2
3
4
5
6
7
8
9
10
11
12
13
14
15
16
17
18
19
20
21
22
23
24
25
26
27
28
29
30
31
32
33
34
35
36
37
38
39
40
41
42
43
44
45
46
47
48
49
50
51
52
53
54
55
56
57
58
59
60
#!/bin/bash

DIR="$(cd "$(dirname "$0")" && pwd)"
cd $DIR
export LD_LIBRARY_PATH=$DIR:$LD_LIBRARY_PATH


hosts=/etc/hosts
conf=/var/lib/redis/nodes.conf

newip=$(cat $hosts|grep redis-app|awk '{print $1}')
[ "$newip"x != ""x ] || { echo "hosts里没有找到redis-app的ip,退出" && exit 1; }

ckeckConf(){
[ -f "$1" ] || { echo "集群配置文件nodes.conf不存在,集群初始化中..." && return; }


echo "检查nodes.conf文件内容..."
arr="$(cat $1|grep -E "master|slave"|awk '{print $1}')"
len=$(echo "${arr}" | wc -l)
echo -e "$len条clusterid,如下: \n""${arr}"
[ "$len" -ne 1 ] || { echo "集群配置文件clusterid数目不对,请到nfs服务器核查node.conf文件,退出" && exit 1; }


myselfid=$(cat $1 |grep myself|awk '{print $1}')
[ "$myselfid"x != ""x ] || { echo "nodes.conf里没有找到myselfid,退出" && exit 1; }
echo "把新ip写入自身clusterid文件内..."
echo $newip > $PWD/$myselfid
echo "k8s重启后: $myselfid -> $newip";

for i in ${arr};
do
[ -f "./$i" ] || { echo "没有./$i这个目录" && continue; }

checkip=$(cat ./$i)
[ "$checkip"x != ""x ] || { echo "clusterid文件内容为空" && continue; }

echo "执行命令:ping -c1 $checkip"
$DIR/ping -c1 $checkip
[ $? -ne 1 ] || { echo "ping $newip 结果返回ip不通" && continue; }

oldip=$(cat $1 |grep -E "^$i"|awk '{print $2}'|cut -d ":" -f1)
[ "$oldip"x != ""x ] || { echo "clusterid在nodes.conf里没有搜索到ip,退出" && exit 1; }

echo "oldip:$oldip =========== newip:$checkip"
sed -i "s/$oldip/$checkip/g" $1
[ $? -ne 0 ] || { echo "完成替换,clusterid:$i === ip:$checkip" && continue; }

done

echo "配置文件nodes.conf,检查完毕..."
}

echo "$newip 开始检查配置文件nodes.conf"
ckeckConf $conf

[ "$(which redis-server)"x != ""x ] || { echo "找不到redis-server,退出" && exit 1; }
echo "开始启动服务...."
echo "执行命令:redis-server $1 --cluster-announce-ip $newip"
redis-server $1 --cluster-announce-ip $newip

 .
├──  libcap.so.2
├──  libidn.so.11
├──  ping
└──  start.sh

pod

1
2
3
4
5
6
7
8
9
10
11
kubectl -n devops get pods
NAME READY STATUS RESTARTS AGE
redis-app-0 1/1 Running 0 50m
redis-app-1 1/1 Running 0 50m
redis-app-2 1/1 Running 0 44m
redis-app-3 1/1 Running 0 38m
redis-app-4 1/1 Running 0 38m
redis-app-5 1/1 Running 0 38m

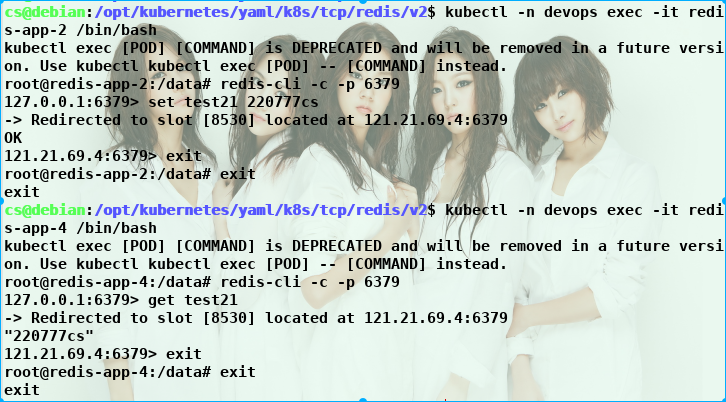
kubectl -n devops exec -it redis-app-2 /bin/bash
kubectl -n devops exec -it redis-app-4 /bin/bash

redis-cli -c -p 6379

svc ClusterIP

两次认证?

1
2
3
4
5
6
7
8
9
10
11
12
13
14
15
16
17
18
19
20
21
22
cs@debian:~/oss/hexo$ kubectl get svc -n devops
NAME TYPE CLUSTER-IP EXTERNAL-IP PORT(S) AGE
jenkins ClusterIP 121.21.92.146 <none> 8081/TCP,50000/TCP 105d
redis-headless-service ClusterIP None <none> 6379/TCP 13d
redis-service ClusterIP 121.21.24.33 <none> 6379/TCP 13d
tomcat ClusterIP 121.21.191.100 <none> 8082/TCP 105d

cs@debian:~/oss/hexo$ kubectl exec -it redis-app-1 -n devops /bin/bash
kubectl exec [POD] [COMMAND] is DEPRECATED and will be removed in a future version. Use kubectl kubectl exec [POD] -- [COMMAND] instead.
.............
root@redis-app-1:/data# redis-cli -c -h 121.21.24.33 -p 6379
121.21.24.33:6379> auth 123456
OK
121.21.24.33:6379> ping
PONG
121.21.24.33:6379> get test21
-> Redirected to slot [8530] located at 121.21.35.3:6379
(error) NOAUTH Authentication required.
121.21.35.3:6379> auth 123456
OK
121.21.35.3:6379> get test21
"20220721cs"

traefik deploay 配置 redis

1
2
3
4
5
cs@debian:/opt/kubernetes/yaml/k8s/tcp/redis$ redis-cli  -c  -p  6379
127.0.0.1:6379> auth 123456
OK
127.0.0.1:6379> ping
PONG

127.0.0.1 - 192.168.56.103:6379, 192.168.56.101:6379, 192.168.56.102:6379 - [19/Jul/2022:22:10:12 +0800] 200 0, 0, 82

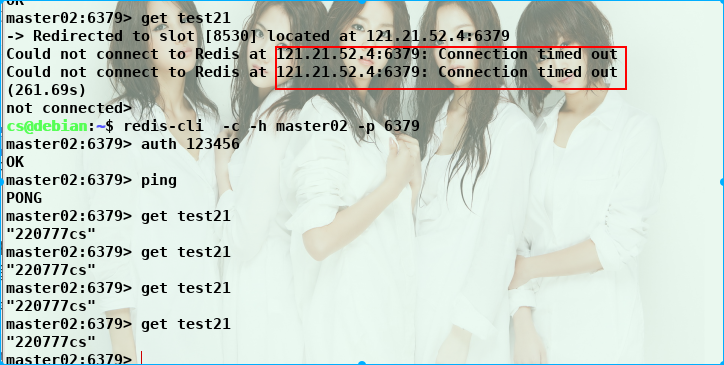
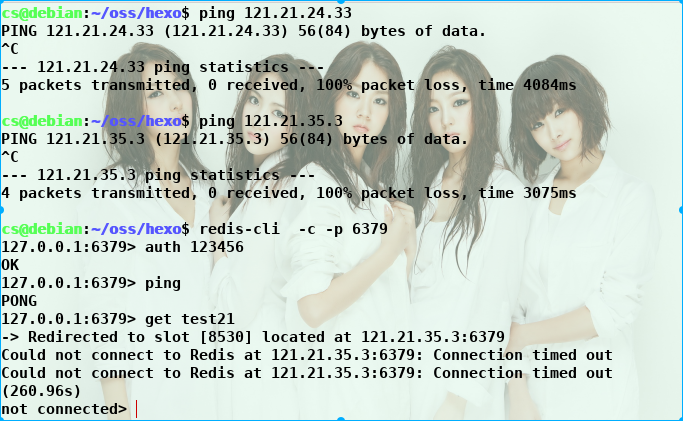
不通超时

根据podip定位集群pod

1
2
3
cs@debian:~/oss/hexo$  kubectl  get pod --field-selector status.podIP=121.21.35.3 -o wide -n devops
NAME READY STATUS RESTARTS AGE IP NODE NOMINATED NODE READINESS GATES
redis-app-1 1/1 Running 1 9d 121.21.35.3 node04 <none> <none>

redis集群配置

ACL

1
2
3
4
5
6
7
8
9
10
11
12
13
14
15
16
17
18
19
20
127.0.0.1:9736> ACL WHOAMI
"default"

127.0.0.1:9736> ACL SETUSER cs +@read +@write on allkeys
OK

127.0.0.1:9736> acl setuser cs +ping on allkeys
OK

127.0.0.1:9736> acl users
1) "cs"
2) "default"
3) "logs"

127.0.0.1:9736> acl list
1) "user cs on sanitize-payload #8d969eef6ecad3c29a3a629280e686cf0c3f5d5a86aff3ca12020c923adc6c92 ~* resetchannels -@all +@read +@write +ping"
2) "user default on sanitize-payload #bbdac2e00dec531c592e9ee501cc64fde0a4a1795bb164f156982a50a4774170 ~* &* +@all"
3) "user logs on sanitize-payload #bbdac2e00dec531c592e9ee501cc64fde0a4a1795bb164f156982a50a4774170 ~* resetchannels +@all"


读写特定的键

1
2
3
127.0.0.1:6379> ACL SETUSER cs +@read +@write on mykey
#~code、~name 和 ~school 分别表示匹配键
127.0.0.1:6379> ACL SETUSER cs +@read ~code ~name ~school on db1 >mypassword
1
2
3
127.0.0.1:9736> ACL SETUSER test +@read +@write ~db:1 on allkeys >mypassword
127.0.0.1:9736> ACL SETUSER test +@read +@write ~db:9 on allkeys >test9
127.0.0.1:9736> CONFIG REWRITE

保存规则

如果使用 config 模式,将 ACL 权限持久化到 redis.conf 文件中使用下面的命令

1
2
127.0.0.1:9736> CONFIG REWRITE
OK

如果使用 aclfile 模式,将 ACL 权限持久化到 users.acl 文件中使用下面的命令

acl save

backup

RDB

将 Redis 数据库的快照保存到磁盘文件中来实现

1
2
3
save 900 1   # 900秒内至少有1个键被改变则进行快照保存
save 300 10 # 300秒内至少有10个键被改变则进行快照保存
save 60 10000 # 60秒内至少有10000个键被改变则进行快照保存

AOF

每个写操作追加到一个文件中。通过重放这些写操作,可以完全恢复数据集的状态

混合备份

同时使用 RDB 和 AOF 备份

定时备份+实时备份

1
2
3
4
5
6
7
8


#AOF
appendonly yes
appendfsync everysec
no-appendfsync-on-rewrite no
auto-aof-rewrite-percentage 100
auto-aof-rewrite-min-size 64mb

init

1
2
3
4
5
6
7
8
9
10
11
12
13
#!/bin/sh

arr=($(kubectl get pods -l app=redis -o jsonpath='{range.items[*]}{.status.podIP}:6379 '))
echo ${arr[@]}

master=$(echo ${arr[@]}|awk '{print $1" "$2" "$3}')
echo "指定主节点:$master"
echo "yes" | kubectl exec -it redis-app-2 -- redis-cli --cluster create $master

for i in $(seq 3 +1 5); do
echo "添加从节点:"${arr[i]} ${arr[0]}
echo "yes" | kubectl exec -it redis-app-2 -- redis-cli --cluster add-node ${arr[i]} ${arr[0]} --cluster-slave
done

====echo ${arr[@]}|tr -s ‘ ‘|cut -d’ ‘ -f2
==tr
-s 即将重复出现字符串,只保留第一个
==cut
-d 以什么为分割符
-f 第几个
组合等于 awk ‘{print $2}’

=====jsonpath=’{range.items[:3]}{.status.podIP}:6379 ‘
items[:3] 取前3
=====jsonpath=”{range.items[$i,0]}{.status.podIP}:6379 “
双引号传变量

故障

内存问题

设置合理的maxmemory参数

配置合适的数据淘汰策略 LRU(Least Recently Used,最近最少使用)

网络问题

设置超时时间

大key问题

主备切换

业务重试机制

某些慢查询导致time out。执行slowlog查看慢查询语句

连接数 tcp连接:netstat -nat|grep -i “6379”|wc -l

无法获取连接 设置config 参数 timeouttcp-keepalive来清理失效的连接

优化策略

  1. 内存管理

    • maxmemory: 设置 Redis 使用的最大内存量。
    • maxmemory-policy: 定义达到内存上限时的处理策略,如 allkeys-lruvolatile-lruallkeys-random 等。
  2. 持久化

    • appendonly: 是否使用追加文件(AOF)持久化。
    • appendfsync: AOF 持久化的同步频率,可以是 everysecalwaysno
  3. 网络连接

    • tcp-backlog: 设置 TCP 连接的 backlog,影响并发连接数。
    • timeout: 客户端空闲连接的超时时间。
  4. 性能调优

    • databases: 设置数据库的数量,默认为 16。
    • rdbcompression: 是否对 RDB 快照文件进行压缩。
    • hash-max-ziplist-entrieslist-max-ziplist-size 等:调整数据结构的内存优化配置。
  5. 日志记录

    • loglevel: 日志级别,如 debugverbosenoticewarning
    • logfile: 日志文件的路径。
  6. 安全性

    • protected-mode: 是否启用保护模式,防止未授权访问。
    • requirepass: 设置密码保护。
  7. 客户端输出缓冲区限制

    • client-output-buffer-limit: 设置不同类别客户端的输出缓冲区限制。
  8. LRU 缓存淘汰

    • active-expire-cycles: 设置 LRU 缓存淘汰的周期。
  9. 超时和Keepalive

    • tcp-keepalive: 设置 TCP 保活参数。
  10. 主从复制

    • slave-read-only: 设置从服务器是否只读。
    • min-slaves-to-write: 设置至少需要多少个从服务器在线,主服务器才接受写入。
  11. 集群配置(如果使用 Redis 集群):

    • cluster-enabled: 是否启用集群模式。
    • cluster-config-file: 集群配置文件的位置。

solt槽位

方案一: 直接在集群内执行rebalance

1
2
redis-cli -a <password> --cluster rebalance 192.168.33.147:6379
该操作较为花费时间,建议在晚上8 9点之后进行。1.2.

方案二: 手动进行Reshared

1
2
redis-cli -a <password> --cluster reshard 192.168.33.151:6379 --cluster-from fd9d994b67b91xasdff293b363dadcfe617a19gs1 --cluster-to 01981f970cfe668e1bfedfasb35175f85axde --cluster-slots 50 --cluster-yes
from后边跟 从哪个节点移出来的ID, to后边跟想移到哪个节点的ID, cluster-slots后边填多少个槽位 每次迁移。1.2.

方案三: 单个槽位迁移

登录后复制

1
2
3
4
redis-cli -h 192.168.33.34 -p 6379 -a <password> CLUSTER SETSLOT 2209 IMPORTING fd9d994b67b9193ba9f293b363dadcfe617a191d  某个槽位归属于某个节点
redis-cli -a <password> CLUSTER SETSLOT 2209 MIGRATING fd9d994b67b9193ba9f293b363dadcfe617a191d 槽位迁移于某个节点
redis-cli -a <password> CLUSTER SETSLOT 2209 NODE 8ee0a098c32642388b79912ba94c2e45f1d8af98
2209 是槽位号。
1
2
3
4
5
6
7
8
9
10
11
12
13
14
#!/bin/bash

# 替换端口号为 Redis 集群的任意节点的端口
PORT=6379

# 获取集群节点信息
nodes_info=$(redis-cli -p $PORT CLUSTER NODES)

# 提取所有 node ID
echo "$nodes_info" | grep 'id=' | sed -e 's/.*id=\([^ ]*\) .*/\1/'

# 打印结果
echo "Node IDs in the cluster:"
echo "$node_ids"
reshard_move_slots.sh
reshard
#!/bin/bash
for i in `seq 0 10`;do
mapfile -t ips < "node.txt"
for node in "${ips[@]}"; do
        redis-cli -a '' --cluster reshard 192.168.33.98:6379 --cluster-from fd9d994b67b9193ba9f293b363dadcfe617a191d --cluster-to $node --cluster-slots 50 --cluster-yes
        #这里的from是填那个槽位最多的节点ID
        echo "上次迁移的返回值为:$?"
        if [ $? -eq 1 ]; then
        echo "上一个命令返回值为1,中断脚本执行。"

exit 1 else echo "上一个命令返回值不为1,继续执行脚本。" fi echo "节点$node执行迁移完毕,正在迁移下一个节点,3s后开始,。。。。" echo "当前是第$i个循环!" sleep 3 done echo "第$i遍执行完毕,,正在sleep 3s。。。。。。" sleep 3 done

mysql配置文件

linux

my.cnf

1
2
3
4
5
6
7
8
9
10
11
12
13
14
15
16
17
18
19
20
21
22
23
24
25
26
27
28
29
30
[mysqld]
#server-id = 224
user = mysql
port = 3305
mysqlx_port = 33060
mysqlx_socket = /tmp/mysqlx.sock
datadir = /opt/mysql/data
socket = /tmp/mysql.sock
pid-file = /tmp/mysqld.pid
auto_increment_offset = 2
auto_increment_increment = 2
log-error = /opt/mysql/log/error.log
slow-query-log = 1
slow-query-log-file = /opt/mysql/log/slow.log
long_query_time = 0.2
log-bin = bin.log
relay-log = relay.log
binlog_format =ROW
relay_log_recovery = 1
character-set-client-handshake = FALSE
character-set-server = utf8mb4
collation-server = utf8mb4_unicode_ci
init_connect ='SET NAMES utf8mb4'
innodb_buffer_pool_size = 1G
join_buffer_size = 128M
sort_buffer_size = 2M
read_rnd_buffer_size = 2M
log_timestamps = SYSTEM
lower_case_table_names = 1
default-authentication-plugin =mysql_native_password

win

my.ini

1
2
3
4
5
6
7
8
9
10
11
12
13
14
15
16
17
18
19
20
21
22
23
24
25
26
27
28
29
[client]
port=3306

[mysql]
default-character-set=utf8mb4


[mysqld]
port=3306
#password=123456
#character-set-client-handshake=FALSE
character-set-server=utf8mb4
#collation-server = utf8mb4_general_ci
init_connect='SET NAMES utf8mb4'


basedir="D:/360Downloads/mysql-5.7.20-winx64"
#Path to the database root
datadir="D:/360Downloads/mysql-5.7.20-winx64/data"

log-error="D:/360Downloads/mysql-5.7.20-winx64/log/mysqld_err.log"
#log-bin="D:/360Downloads/mysql-5.7.20-winx64/log/mysqld_bin.bin"

default-storage-engine=INNODB
#从 5.6开始,timestamp 的默认行为已经是 deprecated 了
explicit_defaults_for_timestamp=true

sql_mode="STRICT_TRANS_TABLES,NO_ZERO_IN_DATE,NO_ZERO_DATE,ERROR_FOR_DIVISION_BY_ZERO,NO_AUTO_CREATE_USER,NO_ENGINE_SUBSTITUTION"

主从

doc https://dev.mysql.com/doc/refman/8.0/en/replication-howto-masterstatus.html

复制原理

  • 主服务数据变更记录保存到binlog
  • 从服务器的io线程请求主的binlog,写入到中继日志relaylog
  • 从服务器的sql线程从中继日志读取事件,并在本地执行事件,从而实现数据的同步

新帐号

1
CREATE USER 'repl'@'192.168.16.232' IDENTIFIED BY '123456';

只复制

1
GRANT REPLICATION SLAVE ON *.* TO 'repl'@'192.168.16.232';

配置mysql.cnf

1
2
[mysqld]
server-id=1
1
2

show master status;

File: mysql-bin.000001
Position: 765

配置mysql.cnf

1
2
3
4
[mysqld]
server-id=2
#设置为只读状态,针对普通MySQL数据库用户
read_only=1

set global read_only=1;–针对普通MySQL数据库用户设置为只读
set global super_read_only=1;–针对super类MySQL数据库用户设置为只读,比如root用户
//flush tables with read lock;–设定全局锁,如果只是需要只读,并不需要加锁
show global variables like “%read_only%”;–查询全局变量表数据情况

备份

1
2
3
4
5
mysql -uroot -h 主 -p  database >back.sql;

#登陆从库
source back.sql;

1
2
3
4
5
6
7

stop slave;

reset slave;

reset master;

关键

把 show master status\G FilePosition对号入座

1
2
3
4
5
6
7
8
9
10
11
12
13

CHANGE MASTER TO

MASTER_HOST='master_host_name',

MASTER_USER='主用户名',

MASTER_PASSWORD='主密码',

MASTER_LOG_FILE='主status File',

MASTER_LOG_POS=主status Position;

开启从库

1
start slave;

检查状态

1
2
3

show slave status\G

Slave_IO_Running: Yes

Slave_SQL_Running: Yes

故障

1
2
3
sudo ls -l /proc/`pidof mysqld`/fd | wc
MySQL数据库里统计已经打开的文件数查看状态参数
Open_table_definitions 和 Open_tables

进程

1
2
3
配置文件 /etc/security/limits.conf
检查进程的限制:
cat /proc/`pidof mysqld`/limits|grep "Max open files'

mariadb

https://mariadb.org/download/?t=mariadb&p=mariadb&r=11.3.0

mariadb-11.2.1 mirrors.aliyun.com

mysql安装

linux

下载 https://downloads.mysql.com/archives/community/

Compressed TAR Archive, Minimal Install 不包含调试和测试工具

1
2
xz -d mysql-8.0.28-linux-glibc2.17-x86_64-minimal.tar.xz
tar -xvf mysql-8.0.28-linux-glibc2.17-x86_64-minimal.tar

用户组

1
2
3
4
5
6
7
8
9
10
11
#添加组
sudo groupadd mysql
sudo useradd -r -M -s /sbin/nologin -g mysql mysql -d /opt/mysql

# cs 或 ${USER}
sudo chown mysql:${USER} -R /opt/mysql/*

cs@debian:~/data/software$ cat /etc/group | grep mysql
mysql:x:512:cs
cs@debian:~/data/software$ cat /etc/passwd | grep mysql
mysql:x:512:512::/home/mysql:/sbin/nologin

初始化数据库

1
$ sudo /opt/mysql/bin/mysqld  --initialize --user=mysql --console

……

—-2022-01-30T00:14:24.872326+08:00 6 [Note] [MY-010454] [Server] A temporary password is generated for root@localhost: bDB,fVSmt2/U

修改配置

默认/etc/my.cnf

1
2
3
4
url=/opt/mysql
sed -n "/^basedir=/s#=#==$url#"p ./mysql.server
sed -n "/^datadir=/s#=#=$url/data#"p ./mysql.server
sed -n "s#conf=.*#conf=$url/my.cnf#"p ./mysql.server

开机启动

1
2
3
4
5
sudo cp /opt/mysql/support-files/mysql.server  /etc/init.d/mysql
设置为开机自动运行
sudo update-rc.d mysql defaults
设置为取消开机自动运行
sudo update-rc.d -f mysql remove

密码

1
2
3
4
5
6
7
8
9
10
11
12
13
14
15
16
17
18
19
20
21
##### 临时密码登录,执行语句提示 You must reset your password using ALTER USER statement before executing this statement.
--- alter user user() identified by "123456"; ##密码字符串双引号

---低于版本8---SET PASSWORD FOR root@localhost = '123456';
---版本8以上---ALTER USER 'root'@'localhost' IDENTIFIED WITH mysql_native_password BY '123456';

##用户密码过期时间250天
ALTER USER ‘cs’@‘localhost' PASSWORD EXPIRE INTERVAL 250 DAY;
###禁用过期 --恢复默认策略 PASSWORD EXPIRE DEFAULT----
ALTER USER 'cs'@'localhost' PASSWORD EXPIRE NEVER;

###密码过期的策略
show variables like 'default_password_lifetime';
---设置密码永不过期,需要把default_password_lifetime修改为 0
---set global default_password_lifetime = 0;

CREATE USER 'cs'@'localhost' IDENTIFIED BY '123456';


###修改执行生效语句
flush privileges;

win

下载地址:http://dev.mysql.com/downloads/mysql/

管理员权限运行cmd

1
E:\MySQL\MySQL Server 5.7\bin>mysqld install MySQL --defaults-file="E:\MySQL\MySQL Server 5.7\my.ini"

install/Remove of the Service Denied!

1
bin>mysqld --initialize --user=mysql --console

启动服务

1
net start MySQL

删除

1
sc delete MySQL

other

Permission denied

检查目录所属用户mysql

rm /tmp/mysql*

1
2
3
4
5
6
❯ ls -l /tmp/mysql*
-rw-r----- 1 mysql mysql 6 6月 4 21:08 /tmp/mysqld.pid
srwxrwxrwx 1 mysql mysql 0 6月 4 21:08 /tmp/mysql.sock
-rw------- 1 mysql mysql 6 6月 4 21:08 /tmp/mysql.sock.lock
srwxrwxrwx 1 mysql mysql 0 6月 4 21:08 /tmp/mysqlx.sock
-rw------- 1 mysql mysql 6 6月 4 21:08 /tmp/mysqlx.sock.lock

端口

1
2
/opt/mysql/bin/mysqld  --initialize-insecure --user=mysql  --lower-case-table-names=1
/opt/mysql/bin/mysqld --user=mysql &

╰─❯ 2023-06-04T11:50:10.086155Z 0 [System] [MY-010116] [Server] /opt/mysql/bin/mysqld (mysqld 8.0.32) starting as process 5008
2023-06-04T11:50:10.089112Z 0 [Warning] [MY-010122] [Server] One can only use the –user switch if running as root
2023-06-04T11:50:10.094189Z 1 [System] [MY-013576] [InnoDB] InnoDB initialization has started.
2023-06-04T11:50:10.195060Z 1 [System] [MY-013577] [InnoDB] InnoDB initialization has ended.
2023-06-04T11:50:10.385679Z 0 [Warning] [MY-010068] [Server] CA certificate ca.pem is self signed.
2023-06-04T11:50:10.385746Z 0 [System] [MY-013602] [Server] Channel mysql_main configured to support TLS. Encrypted connections are now supported for this channel.
2023-06-04T11:50:10.386292Z 0 [ERROR] [MY-010262] [Server] Can’t start server: Bind on TCP/IP port: Address already in use
2023-06-04T11:50:10.386343Z 0 [ERROR] [MY-010257] [Server] Do you already have another mysqld server running on port: 3306 ?
2023-06-04T11:50:10.386383Z 0 [ERROR] [MY-010119] [Server] Aborting
2023-06-04T11:50:11.974477Z 0 [System] [MY-010910] [Server] /opt/mysql/bin/mysqld: Shutdown complete (mysqld 8.0.32) MySQL Community Server - GPL.

1
sudo netstat -apn | grep 3306

pip包管理

安装

http://www.python.org/download/

1
2
3
4
5
6
7
 #指定python的安装路径
❯ ./configure --prefix=/home/cs/.local/py3.10 --enable-optimizations

❯ make -j8
❯ make install

❯ /home/cs/.local/py3.10/bin/python3.10 -m pip install --upgrade pip
1
2
3
4
5
6
7
8
#No module named ‘_ctypes’
sudo apt-get install libffi-dev
#No module named '_bz2'
❯ find /usr -type f -name _bz2*.so
cp /usr/lib/python3.11/lib-dynload/_bz2.cpython-311-x86_64-linux-gnu.so /home/cs/stable-diffusion-webui/venv/lib/python3.10/site-packages/_bz2.cpython-310-x86_64-linux-gnu.so

# gradio==3.32.0
pip install httpx==0.23.3
1
2
3
cs@debian:~/oss/typoraCracker$ sudo apt-get install python3-pip
cs@debian:~/oss/typoraCracker$ pip3 -V
pip 20.3.4 from /usr/local/lib/python3.5/dist-packages/pip (python 3.5)

升级

1
2
3
4
5
6
7
8
cs@debian:~/oss/typoraCracker$ sudo pip3 install --upgrade pip
Collecting pip
Downloading http://mirrors.aliyun.com/pypi/packages/27/79/8a850fe3496446ff0d584327ae44e7500daf6764ca1a382d2d02789accf7/pip-20.3.4-py2.py3-none-any.whl (1.5MB)
100% |████████████████████████████████| 1.5MB 5.8MB/s
Installing collected packages: pip
Found existing installation: pip 9.0.1
Not uninstalling pip at /usr/lib/python3/dist-packages, outside environment /usr
Successfully installed pip-20.3.4

国内源

1
2
3
4
5
https://pypi.doubanio.com/simple/豆瓣 
https://mirrors.aliyun.com/pypi/simple/ 阿里
https://mirrors.bfsu.edu.cn/pypi/web/simple/ 中国科学技术大学
https://pypi.tuna.tsinghua.edu.cn/simple/ 清华大学

设置 set

1
2
3
$ pip config set global.index-url https://mirrors.aliyun.com/pypi/simple/
Writing to ~/.config/pip/pip.conf

pip.ini

1
2
3
4
5
6
[global]
timeout = 6000
index-url = https://mirrors.aliyun.com/pypi/simple
extra-index-url = https://pypi.mirrors.ustc.edu.cn/simple/https://mirrors.aliyun.com/pypi/simple/https://pypi.tuna.tsinghua.edu.cn/simple/http://pypi.mirrors.ustc.edu.cn/simple/https://pypi.org/simple/
[install]
trusted-host = pypi.mirrors.ustc.edu.cnpypi.mirrors.ustc.edu.cnmirrors.aliyun.compypi.tuna.tsinghua.edu.cnpypi.mirrors.ustc.edu.cnpypi.org

extra-index-url 备用

trusted-host此参数是为了避免麻烦,否则使用的时候可能会提示不受信任

查看 lsit

1
2
3
4
5
6
7
8
❯ pip config list
freeze.timeout='10'
global.extra-index-url='https://pypi.mirrors.ustc.edu.cn/simple/\nhttps://mirrors.aliyun.com/pypi/simple/\nhttps://pypi.tuna.tsinghua.edu.cn/simple/'
global.index-url='https://mirrors.aliyun.com/pypi/simple'
global.timeout='60'
global.trusted-host='mirrors.aliyun.com'
install.trusted-host='mirrors.aliyun.com\npypi.tuna.tsinghua.edu.cn\npypi.mirrors.ustc.edu.cn'

requirement

生成requirement.txt文件

pipreqs

在命令行中输入pip install pipreqs,然后进入项目目录,并执行pipreqs --encoding=utf8 --force命令

freeze

文件包含的包是当前环境所有的包

pip3 freeze > requirements.txt

install

安装 requirements.txt 文件

pip install -r requirements.txt

卸载

1
sudo apt-get remove python3-pip

debian 12

pipx会安装大量的依赖项

1
2
3
sudo apt install pipx

pipx install torch --include-deps

export PATH=$PATH:”/home/xxx/.local/bin”

https://www.yaolong.net/article/pip-externally-managed-environment/

强制删除此警告(不建议)

1
2
3
4
5
❯ ls -l /usr/lib/python3.11/EXTERNALLY-MANAGED
-rw-r--r-- 1 root root 645 2023年 3月13日 /usr/lib/python3.11/EXTERNALLY-MANAGED
❯ sudo mv /usr/lib/python3.11/EXTERNALLY-MANAGED /usr/lib/python3.11/EXTERNALLY-MANAGED.bak

sudo mv /usr/lib/python3.11/EXTERNALLY-MANAGED.bak /usr/lib/python3.11/EXTERNALLY-MANAGED

和之前一样,现在您可以直接运行 pip

创建虚环境

1
python3 -m venv  /home/cs/oss/sd/sd-venv
1
2
3
4
5
6
7
8
9
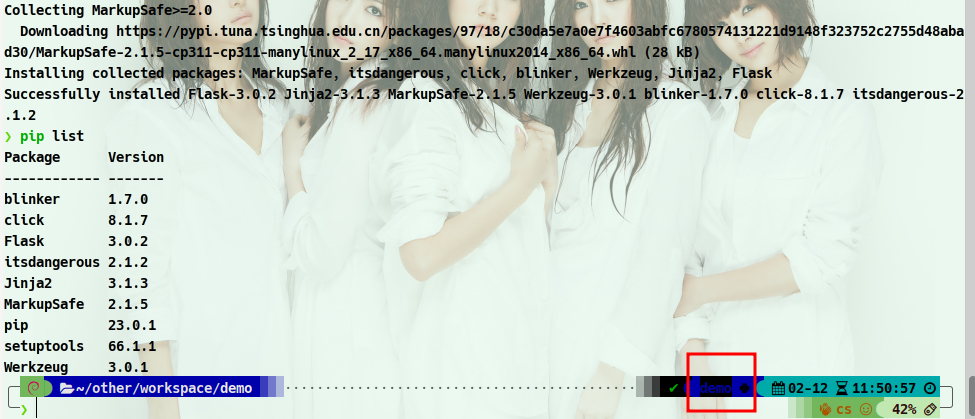
❯ python3 -m venv  ./venv
❯ . ./venv/bin/activate
❯ pip list
Package Version
---------- -------
pip 23.0.1
setuptools 66.1.1
❯ pip install Flask

python setup

1
2
python setup.py install --record files.txt 记录安装后文件的路径
cat files.txt | xargs rm -rf 删除这些文件

tomcat优化

jvm参数

启动jvm参数

1
JAVA_OPTS="-server -XX:NewSize=256m -XX:MaxNewSize=256m -XX:PermSize=512M -XX:MaxPermSize=1024m -Xms2048m -Xmx2048m "

-Xms:Java虚拟机初始化时堆的最小内存,一般与 Xmx配置为相同值,这样的好处是GC不必再为扩展内存空间而消耗性能;

-Xmx:Java虚拟机可使用堆的最大内存;

-XX:PermSize:Java虚拟机永久代大小;

-XX:MaxPermSize:Java虚拟机永久代大小最大值;

-XX:NewSize=:新生代空间初始化大小

-XX:MaxNewSize=:新生代空间最大值

jmap –heap $pid 可以看到MaxHeapSize 等参数已经生效

配置优化

connection并发优化

/tomcat-8.5.38/conf/server.xml

https://tomcat.apache.org/tomcat-8.5-doc/config/executor.html

1
2
3
4
5
6
7
8
9
10
<Executor   name="tomcatThreadPool"
namePrefix="req-thead-exc"
maxHttpHeaderSize="8192"
maxThreads="1000"
minSpareThreads="75"
maxQueueSize="Integer.MAX_VALUE"
maxIdleTime="60000"
threadPriority="5"
className="org.apache.catalina.core.StandardThreadExecutor"
/>

maxThreads: 服务器端最佳线程数量=((线程等待时间+线程cpu时间)/线程cpu时间) * cpu数量,压测计算,要排除单纯处理业务耗时方法,如果未指定,默认值为200

minSpareThreads:线程的最小运行数目,这些始终保持运行。如果未指定,默认值为10。

maxHttpHeaderSize:请求和响应的HTTP头的最大大小,以字节为单位指定。如果没有指定,这个属性被设置为8192(8 KB)。

1
2
3
4
5
6
sed -i '/connectionTimeout=/i\  executor="tomcatThreadPool"' /opt/apache/tomcat-8.5.38/conf/server.xml 

<Connector port="8080" protocol="HTTP/1.1"
executor="tomcatThreadPool"
connectionTimeout="20000"
redirectPort="8443" />

connectionTimeout代表连接超时时间,单位为毫秒,默认值为60000。通常情况下设置为30000。

https://tomcat.apache.org/tomcat-8.5-doc/config/http.html

cache缓存压缩优化

/tomcat-8.5.38/conf/context.xml

tomcat8以上对resource采取了cache,而默认的大小是10M

consider increasing the maximum size of the cache

1
sed -i '/^<\/Context>/i\<Resources cachingAllowed="true"  cacheMaxSize="102400" \/>'  /opt/apache/tomcat-8.5.38/conf/context.xml

context.xml文件内添加到节点内

cacheMaxSize值按需设置,单位K ,

安全优化

普通用户启动/修改端口号

清空站点目录下ROOT下管理页面等文件,ROOT下有一些站点的管理程序可以查看tomcat的各种信息及配置

关闭DNS查询,方式是修改server.xml文件中的enableLookups参数值改为false:enableLookups="false"

设置session过期时间

1
2
3
4
5
6
7
8
9
10
11
12
13
14
1.在tomcat——>conf——>servler.xml文件中定义:  
<Context path="/test" docBase="/test"  
defaultSessionTimeOut="3600"
isWARExpanded="true"  
isWARValidated="false"
isInvokerEnabled="true"  
isWorkDirPersistent="false"/>   
defaultSessionTimeOut="3600"  
2. 项目所在目录下的 web.xml中定义:  
<session-config>  
<session-timeout>20</session-timeout>  
</session-config>  
3. 在程序中定义:  
session.setMaxInactiveInterval(30*60);设置单位为秒,设置为-1永不过期

apt

apt-get

1
2
3
4
5
6
7
8
9
10
11
12
13
14
sed -i "s@http://\(deb\|security\).debian.org@https://mirrors.aliyun.com@g" /etc/apt/sources.list


deb https://mirrors.aliyun.com/debian/ bullseye main non-free contrib
deb-src https://mirrors.aliyun.com/debian/ bullseye main non-free contrib
deb https://mirrors.aliyun.com/debian-security/ bullseye-security main
deb-src https://mirrors.aliyun.com/debian-security/ bullseye-security main
deb https://mirrors.aliyun.com/debian/ bullseye-updates main non-free contrib
deb-src https://mirrors.aliyun.com/debian/ bullseye-updates main non-free contrib
deb https://mirrors.aliyun.com/debian/ bullseye-backports main non-free contrib
deb-src https://mirrors.aliyun.com/debian/ bullseye-backports main non-free contrib


sudo apt update && sudo apt upgrade -y

升级

1
2
apt-get update			   // 更新源文件,并不会做任何安装升级操作 
apt-get upgrade // 升级所有已安装的包

安装

1
apt-get install packagename		// 安装指定的包

查询包

1
apt-cache depends packagename   //该包依赖哪些包

列出所有已经安装

1
apt list --installed

删除

1
apt-get autoremove packagename --purge  //删除包及其依赖的软件包+配置文件等

清理

1
2
3
apt-get clean 						// 清理无用的包  
apt-get autoclean // 清理无用的包
apt-get check // 检查是否有损坏的依赖

apt-mark 标记

系统中禁用 Chrome 更新

1
2
cs@debian:~$ sudo apt-mark  hold google-chrome-stable
google-chrome-stable 设置为保留。

auto 标记指定软件包为自动安装
manual 标记指定软件包为手动安装
minimize-manual 将 meta 包的所有依赖项标记为自动安装
hold 标记指定软件包为保留(held back),阻止软件自动更新
unhold 取消指定软件包的保留(held back)标记,解除阻止自动更新
showauto 列出所有自动安装的软件包
showmanual 列出所有手动安装的软件包
showhold 列出设为保留的软件包

centos

1
echo 'exclude=google-chrome-stable' >> /etc/yum.conf

sudo

/etc/sudoers 只读

1
2
3
4
❯ ls -l /etc/sudoers
-r--r----- 1 root root 689 2月 20 21:59 /etc/sudoers

chmod +w /etc/sudoers

-输入命令 vi /etc/sudoers 进入sudoers文件;

-在vi命令模式中,

输入 /%sudo 搜索定位到 %sudo ALL = (ALL:ALL) ALL,或者手动定位

-在vi插入模式中(按一下 i 键),

在 %sudo ALL = (ALL:ALL) ALL 下面键入 cs ALL = (ALL:ALL) ALL

(同样,这里 cs代表我的普通用户名,大家根据实际修改)

-在vi命令模式中,输入 :x ,即可退出vi并保存文件

别忘了再吧sudoer改回只读模式 chmod -w /etc/sudoers

yum

下载安装包在指定目录

1
yum install --downloadonly --downloaddir=/mnt  zabbix-agent

yumdownloader yum install -y yum-utils

1
2
# 下载包时,同时下载相关依赖
yumdownloader --resolve --destdir=/apps/yumtmp/downloader php
1
2
3
4
5
> rpm -qa |grep httpd #找到安装的https包
xxxx

##卸载上面命令找到的包
> rpm -e --nodeps xxx

本地安装

一: yum -C install

把下载的包,拷贝进缓存包的默认目录/var/cache/yum/base/packages
使用命令yum -C install [packageName]从缓存中安装包

二: yum localinstall

直接指定本地包的文件

1
2
# 安装当前目录下所有的包
yum localinstall *.rpm

三: rpm -ivh –force

暴力安装当前目录下所有的包, 忽略依赖顺序, 简单又省事

1
rpm -ivh --force *.rpm

force就是强制安装

–nodeps就是安装时不检查依赖关系

强弱类型语言

弱类型语言

是一种弱类型定义的语言,某一个变量被定义类型,该变量可以根据环境变化自动进行转换,不需要经过显性强制转换 代表js,php,lua

js

+操作是将A的类型转化为了字符串,然后进行拼接

-操作是将B的类型转化为了数字,然后进行减法

lua

1
2
3
4
5
6
7
8
9
> a=5 
> b="5"
> print(b+a)
10.0
> print(b-a)
0.0
> print(a==b)
false

mongodb

linux 环境

下载

wget https://fastdl.mongodb.org/linux/mongodb-linux-x86_64-debian81-3.4.4.tgz

1
2
3
tar zxvf mongodb*.tar
mv /opt/mongo* /opt
cd /opt/mongodb* && touch mongodb.conf

配置文件

1
2
3
4
5
6
dbpath=/home/cs/Download/mongodb/data #数据库路径
logpath=/home/cs/Download/mongodb/data/logs/mongodb.log #日志输出文件路径
logappend=true #错误日志采用追加模式,配置这个选项后mongodb的日志会追加到现有的日志文件,而不是从新创建一个新文件
journal=true #启用日志文件,默认启用
quiet=true #这个选项可以过滤掉一些无用的日志信息,若需要调试使用请设置为false
port=27017 #端口号 默认为27017

启动

1
cs@debian:/opt/mongodb-3.4.4/bin$ ./mongod  --config  /opt/mongodb-3.4.4/mongodb.conf

后台运行

1
mongo  -f   mongo.conf   & 

使用 fork 必须加上logpath

1
2
mongo   --fork  --logpath=log/mongodb.log   

多条命令执行时 && 可以把 fork配置到conf

1
2
3
4
5
6
7
echo   { \
echo 'dbpath=/data/db'; \
echo 'port=27017'; \
echo 'logpath=/data/mongo.log'; \
echo 'logappend=true'; \
echo 'fork=true'; \
} > mongod.conf

启动

mongo-start.sh

1
2
3
4
5
#!/bin/bash
cd /opt/mongodb-3.4.4/bin
./mongod --config /opt/mongodb-3.4.4/mongodb.conf &
exit
!

win 环境

下载 http://dl.mongodb.org/dl/win32/x86_64
zip 免安装包

启动

1
E:\MongoDB\Server\bin>mongod.exe --config  E:\MongoDB\mongo.conf

mongo.conf

1
2
3
4
5
6
dbpath=E:\MongoDB\data #数据库路径
logpath=E:\MongoDB\logs\mongodb.log #日志输出文件路径
logappend=true #错误日志采用追加模式,配置这个选项后mongodb的日志会追加到现有的日志文件,而不是从新创建一个新文件
journal=true #启用日志文件,默认启用
quiet=true #这个选项可以过滤掉一些无用的日志信息,若需要调试使用请设置为false
port=27017 #端口号 默认为27017

打开 http://127.0.0.1:27017/
It looks like you are trying to access MongoDB over HTTP on the native driver port.

安装服务

管理员cmd
E:\MongoDB\Server\bin>mongod --install --serviceName "MongoDB" --config “E:\MongoDB\mongo.conf”
E:\MongoDB\Server\bin> net start MongoDB

删除服务

sc delete MongoDB

https://www.runoob.com/mongodb/mongodb-connections.html

载入天数...载入时分秒... ,