jenkins
1 | https://gitee.com/tookoff/x-spring-boot.git |
1 | sh 'java --version' |
密码
删除Jenkins目录下config.xml文件中下面代码
1 | <useSecurity>true</useSecurity> |
重新设密码
dae2b24cef9a4edd80fbd8453020062b
插件
https://www.cnblogs.com/zhoading/p/15085279.html
GitLab Hook
https://www.cnblogs.com/ygbh/p/17484753.html
docker-jenkins + gitlab/gogs仓库 + CD配置
https://blog.csdn.net/qq_38127559/article/details/130983686
SonarQube
SonarQube Scanner
SonarQube
- 7.9之后的版本不在支持Mysql。使用PostgreSQL,SonarQube 9.9.5 LTA(2024.06)
PostgreSQL 15
1 | postgres=# CREATE USER sonar WITH PASSWORD 'sonar123456'; |
1 | ❯ psql -h 192.168.122.1 -U sonar -d sonardb -p 5433 |
在git根目录创建SonarQube配置文件
sonar-project.properties
sonar-project.properties
# must be unique in a given SonarQube instance
sonar.projectKey=web_demo_pipline
# this is the name and version displayed in the SonarQube UI. Was mandatory prior to SonarQube 6.1.
sonar.projectName=web_demo_pipline
sonar.projectVersion=1.0

# Path is relative to the sonar-project.properties file. Replace "\" by "/" on Windows.
# sonar.sources:扫描的代码路径,下面代表所有代码
sonar.sources=.
# 排除某些文件夹不扫描
sonar.exclusions=**/test/**,**/target/**

# JDK的版本
sonar.java.source=1.8
sonar.java.target=1.8

# 源码编码格式
# Encoding of the source code. Default is default system encoding
sonar.sourceEncoding=UTF-8
pipeline
pipeline
pipeline {
   agent any

   stages {
      stage('pull code') {
         steps {
            checkout([$class: 'GitSCM', branches: [[name: '*/${branch}']], doGenerateSubmoduleConfigurations: false, extensions: [], submoduleCfg: [], userRemoteConfigs: [[credentialsId: 'b632ed00-fc81-43c8-a746-5aa0673b2658', url: 'git@192.168.66.100:itheima_group/web_demo.git']]])
         }
      }
      stage('code checking') {
         steps {

            script {
                 //引入SonarQubeScanner工具
                scannerHome = tool 'sonar-scanner'
            }
            //引入SonarQube的服务器环境
            withSonarQubeEnv('SonarQube-Server') {
                sh "${scannerHome}/bin/sonar-scanner"
            }
         }
      }
      stage('build project') {
         steps {
            sh 'mvn clean package'
         }
      }
      stage('publish project') {
         steps {
            deploy adapters: [tomcat8(credentialsId: 'fc23e5b7-9930-4dfb-af66-a2a576be52fb', path: '', url: 'http://192.168.66.102:8080')], contextPath: null, war: 'target/*.war'
         }
      }
   }
   post {
         always {
            emailext(
               subject: '构建通知:${PROJECT_NAME} - Build # ${BUILD_NUMBER} - ${BUILD_STATUS}!',
               body: '${FILE,path="email.html"}',
               to: 'xxxx@qq.com'
            )
         }
   }
}
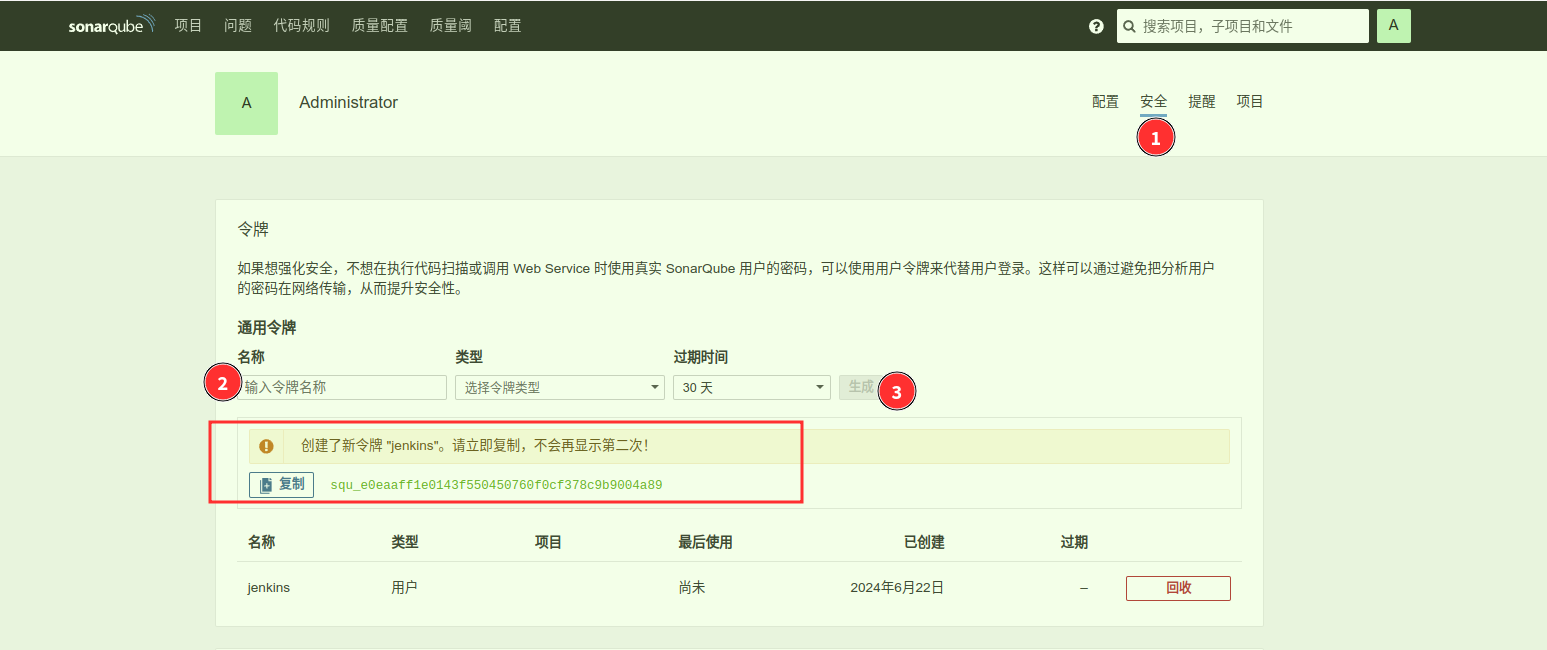
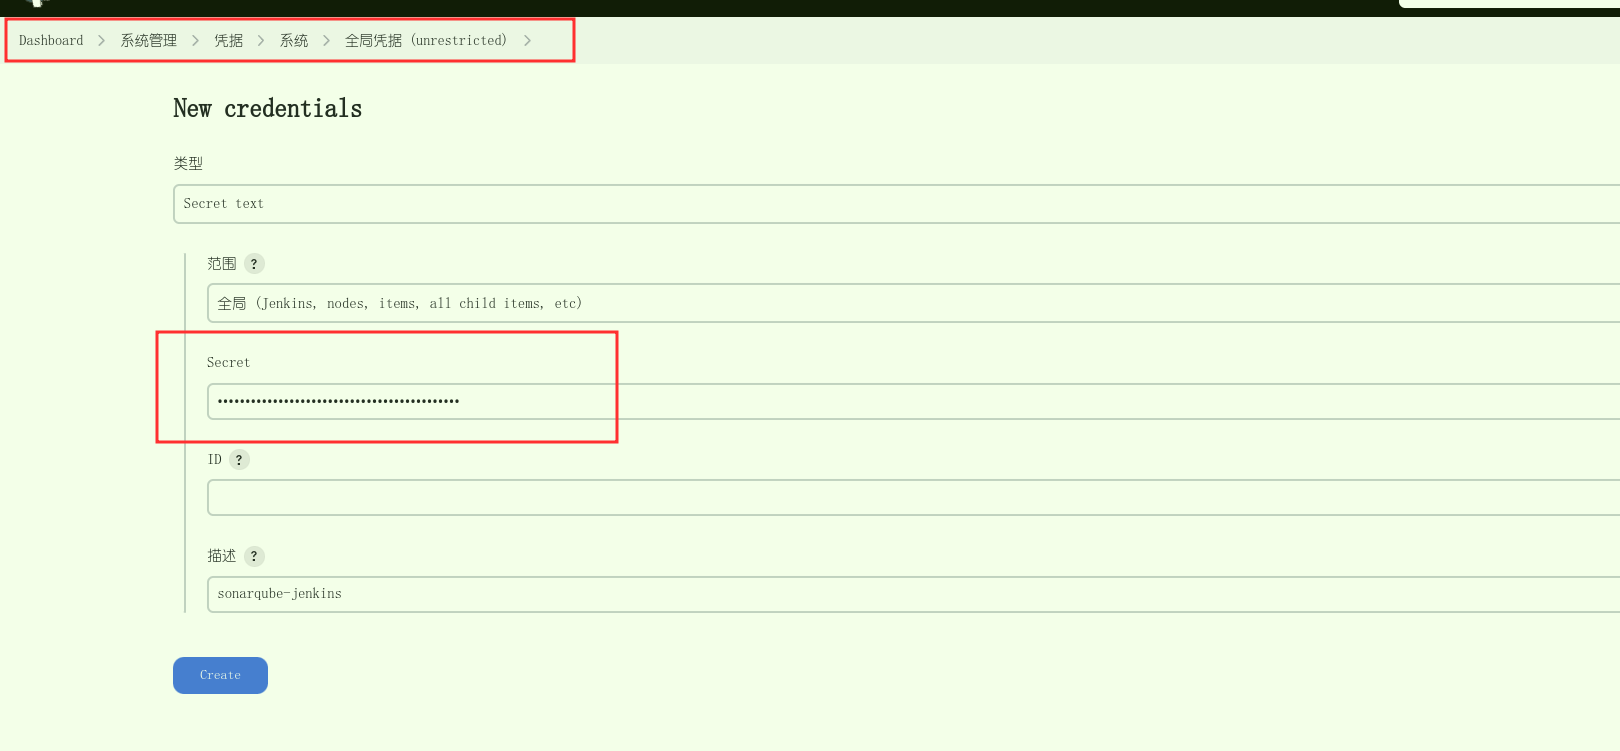
令牌
squ_e0eaaff1e0143f550450760f0cf378c9b9004a89
ERROR
bootstrap check failure [1] of [1]: max virtual memory areas vm.max_map_count [65530] is too low, increase to at least [262144]
echo “vm.max_map_count = 262144” | sudo tee -a /etc/sysctl.conf
#生效
sysctl -p
other
execute shell
采取用execute shell启动/关闭tomcat,会发现可以进行关闭tomcat,但是无法启动tomcat,
BUILD_ID=DONTKILLME java -jar xxx.jar
修改/etc/sysconfig/jenkins配置
JENKINS_JAVA_OPTIONS中加入 -Dhudson.util.ProcessTree.disable=true
重启jenkins
Publish Over SSH
jenkins 容器执行
1 | ssh-keygen -t rsa |
把生产 cat id_rsa.pub 内容追加到应用服务器 /root/.ssh/authorized_keys 里面

项目 Send build artifacts over SSH

node
代理端口设置
Dashboard > 系统管理 > 全局安全配置 > 代理
设置指定端口,并勾选代理协议
web启动
https://blog.csdn.net/wuxingge/article/details/117483179
ssh启动
https://cloud.tencent.com/developer/article/2028101
docker-inbound-agent
https://gitcode.com/jenkinsci/docker-inbound-agent/overview?utm_source=artical_gitcode
1 | #docker run --init jenkins/inbound-agent -url http://jenkins-server:port -workDir=/home/jenkins/agent <secret> <agent name> |
记得替换
<secret>和<agent name>为实际的密钥和代理名称–network jenkins_default 同宿主机,不需要
1 | docker start jenkins_agent |
docker rm docker ps -a | grep jenkins-inbound-agent | awk '{print $1}'
pipline
1 | pipeline { |